
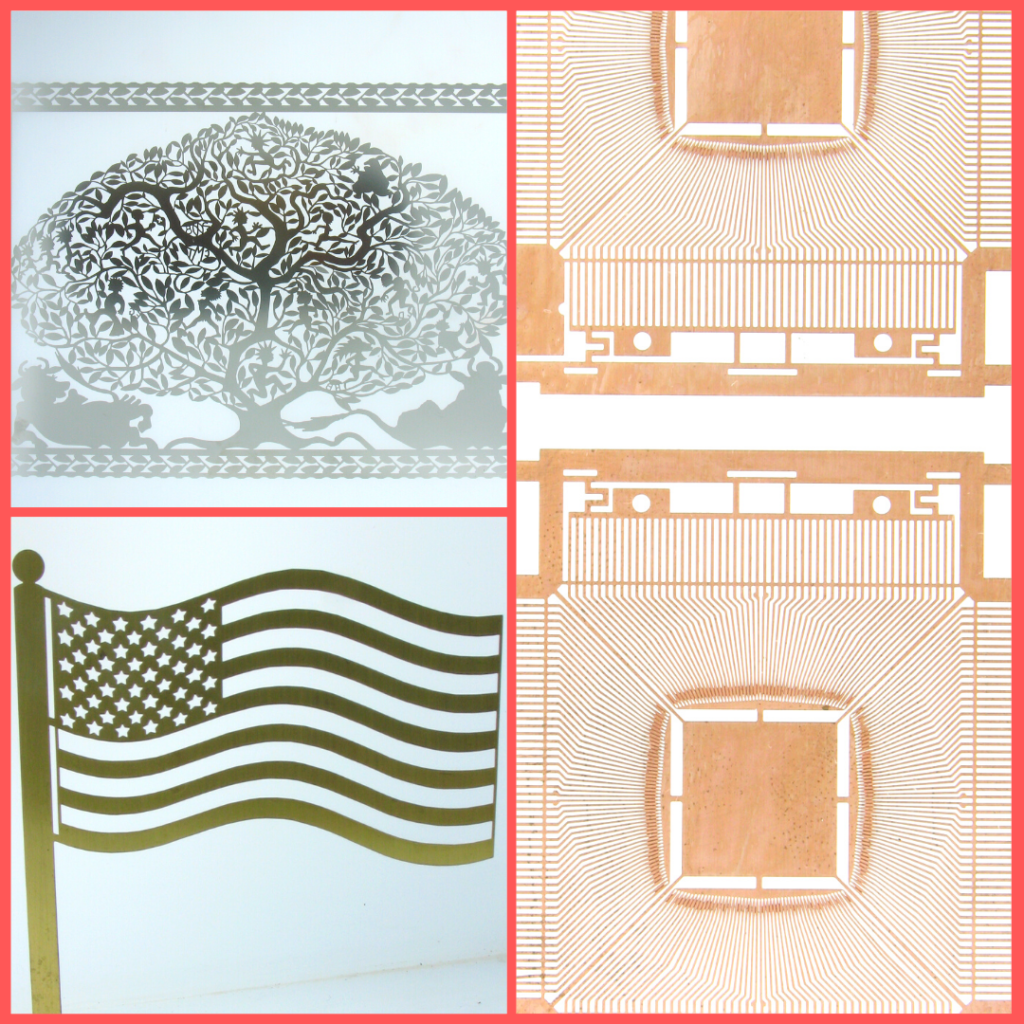
Starting a chemical milling shop works very similarly to a printed circuit board (PCB) shop with a few key differences. In a PCB shop, your only goal is to etch copper so you can receive the circuit pattern you are looking for. In chemical milling, the common goal is to make multiple parts from a metal sheet. The metal used that could be, but is not limited to, copper, brass, steel, titanium, or aluminum. Chemical milling offers an efficient alternative to photo-electroforming, stamping, wire electro-discharge machining, and laser beam machining. In this article, we will touch on where to start planning your chemical milling shop, the processes involved in chemical milling, and what equipment you will need to complete these processes.
Where to start
In chemical milling, like any other business, you should have a solid idea of what you want to produce before you dive in. One of the most important things in this industry for you to know about your product is what material it is going to be made of. Depending on the metal you want to etch, it is going to affect what equipment you are going to need. The selected metal for etching can affect what components you need in your equipment to withstand the active chemistry. Some etchants and solutions are highly incompatible with certain plastics and metals, and thus your equipment can become seriously damaged without careful evaluation. Once you have figured out what your product is, the next step is to determine what equipment you will need. In order to run a chemical milling shop, it is necessary to have equipment to complete the following steps:
- Prepare – Check properties and cut sheet metal to make appropriately sized panels.
- Clean – Remove any materials that would conflict with the adhesion of laminate.
- Laminate – Apply a photosensitive coating to the panels.
- Expose – Treat exposed photosensitive coating with light.
- Develop – Remove untreated photoresist from the panels.
- Etch – Remove exposed metal.
- Strip – Remove remaining photoresist.
- Waste Treatment – Treat contaminated rinse water to meet discharge limits.
- Inspect – Evaluate if products meet specifications.
Prepare (Non-Chemcut product)
To start making your sheet metal products, inspection and measurement tools will be necessary to evaluate panel dimensions and hardness. There are plenty of measurement and inspection tools available but the ones that are the most necessary are tape measures, scales, and calipers.
If you must cut out your panels from a larger sheet, it may be useful to invest in shears appropriate for the job and to pair that with a deburring tool in case it produces sharp edges.
Approximate Cost = $75,000
Clean (Chemcut product)

Cleaning your panels prior to lamination is important because without removing the oils and contaminants from the surface, the photoresist laminate will lift and reduce resolution. Cleaning panels for chemical milling can be done either mechanically or chemically. A mechanical set-up could range from a bucket with a scrubber to a conveyorized brush system. Similarly, a chemical clean set-up could be complete with a bucket or a conveyorized system. Selection of which one to go with can depend on the level of production you wish to achieve, and/or the tolerance for abrasions resulting on the final product. One of the functions of the mechanical clean is to roughen the surface on a microscale to obtain better adhesion of the laminate; therefore, the chemical clean option is most suitable for cases where scratches and abrasions should be minimal.
Approximate Cost = $150,000
Laminate (Non-Chemcut product)
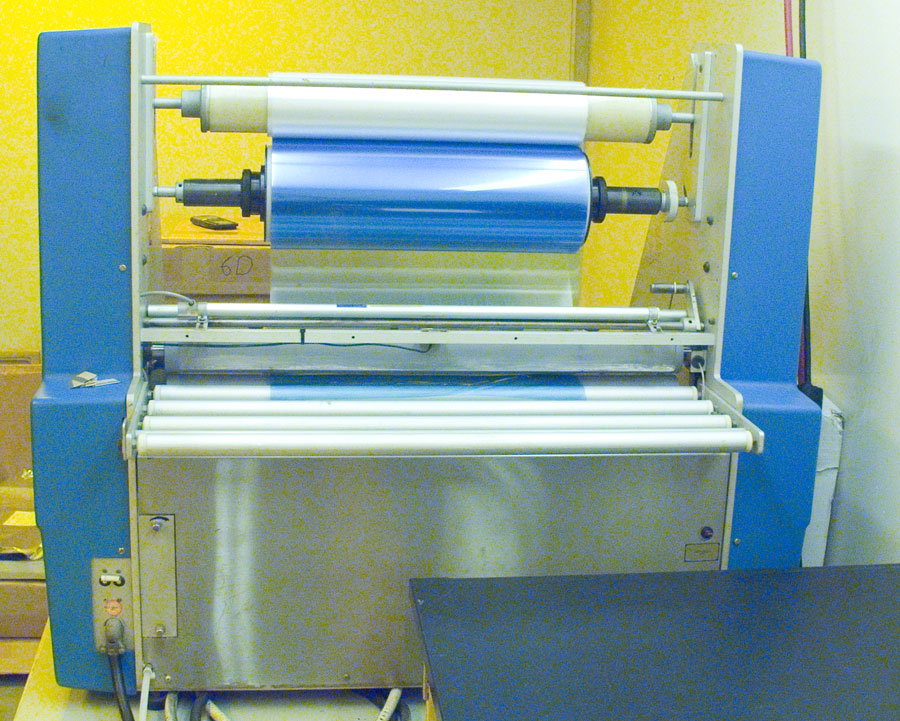
There are two different methods to laminate your panels — wet film and dry film lamination. The most used method of applying wet film is dip-coating. This is a method where a panel is withdrawn through the meniscus of liquid photoresist. For dry film, it is typically applied with hot rollers that compress the photoresist onto the panel. Usually, thinner resist correlates with better resolution. Thinner resist layers can be achieved with liquid resists; however, they can be more difficult to apply than the dry film. With these key differences, dry film may be the most suitable for manufacturing sheet metal parts that do not require ultra-fine lines. Selection of your laminate may also depend on the material of your panel because some resists may be incompatible.
Approximate Cost = $200,000
Exposure (Non-Chemcut product)
There are two different types of exposures — flood exposure and direct imaging. Using a flood exposure consists of utilizing a photo-tool that will cover the surfaces of your panel to control which areas get treated. Direct imaging exposures do not require a photo-tool because they utilize lasers to image the design onto the panel. Regardless of the exposure type, you will have to invest in a room with yellow lighting where exposing will be performed. The purpose of the yellow room is to utilize lighting that will not harm your photoresist while it is being stored or while it is on a panel prior to developing. Depending on the desired resolution, you may also have to invest in transforming the yellow room into a clean room to reduce the likelihood of dust particles interfering with exposure. High-resolution projects require high precision, and because of that direct imaging exposures are the most efficient in cases requiring high resolution. High resolution with flood exposures can be difficult with double-sided exposures because it is easy to have misalignment between the photo-tools. Any misalignment could interfere with attempts to etch through.
Approximate Cost = $200,000
Develop – Etch – Strip (Chemcut product)
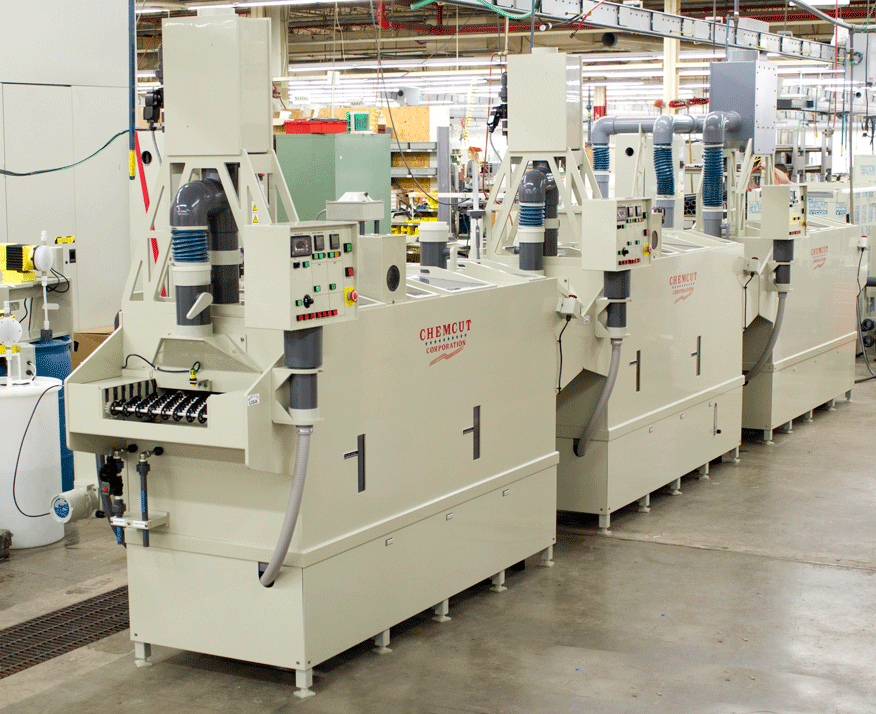
All three of these processes are very similar when it comes to the equipment they need. In some cases, they are capable of being performed in a bucket, but doing these steps in a bucket is far from ideal because of long wait times, inefficient use of chemistry, inconsistent results, and lack of safeguards. Objectively, the best way to go is with a conveyorized system. With conveyorized systems, the baths can be adequately controlled to maintain solution quality. These systems can also come in two different forms — sectional models and modular systems. Sectional models are chambers that are divided into sections where everything is connected. In modular systems, instead of dividing the chambers into sections, the chamber sections are constructed and then connected to others — this allows for more customizability and process flexibility. Commonly, the develop, etch, and strip processes are 3 separate machines, but if the space is available, they can all be connected into one machine so that there is only one loading station and one unloading station. The design and model are highly dependent on your production level, process needs, and available workspace.
During the developing stage, it is important to ensure that you are neither under-developing nor over-developing. Under-developing means that all the untreated photoresist is not being removed, and over-developing means the developer solution is starting to cut under the treated photoresist. Over-developing is problematic because it can reduce resolution, and under-developing is problematic because it may need to go through the developer again — thus leading to bottlenecks. To avoid these, it is recommended to have a breakpoint, a point where untreated resist is clearly removed, at approximately 45-55% of the develop chamber length.
At the etching stage, the most critical variable is etch uniformity. To obtain etch uniformity, the surface of the panel needs a constant feed of fresh etchant. The larger the panel, the more likely it will deviate from a uniform etch. Typically, the edges etch faster than the middle. This is because effectively a puddle of reacted etchant is formed in the middle restricting fresh etchant from reaching the panel surface. Although this is a common issue with large panels, this should not discourage you from using large panels because there are engineered solutions to this problem.
While at the stripping stage of the process, it is important to have stripper solution that is compatible with your photoresist. When stripping, the goal is to remove the photoresist in small chips. If the solution is incompatible, the photoresist will be removed as large chips, goo, or very fine pieces. These become problematic in filtration and can cause the spray nozzles to become clogged.
Having all three of these processes working efficiently is the key to running a successful chemical milling shop.
Approximate Cost = $360,000
Waste Treatment (Chemcut product)
Commonly, this waste treatment is performed as a 5-step batch process. The steps consist of holding, precipitating, clearing, ion exchanging, and finalizing. Each step receives its own tank, but generally the precipitating tank and the final tank are the largest. The holding tank serves the purpose of collecting contaminated rinse water that will be sent to the precipitation tank whenever enough has been collected. The solution is then treated to precipitate heavy metals out. It is important to note that depending on your etch process, your precipitation method may vary.
Once the metals have precipitated out of solution and settled at the bottom of the tank, the water on top is decanted into the clear-well. When the water level gets closer to the precipitate, the rest of the tank contents are fed into a filtration system such as a plate and frame filter press.
When it comes to waste treatment and disposal of hazardous waste, such as the precipitate, it is also important to obtain a discharge permit and to plan a course of action so your hazardous waste can be treated. Heavy metals and other hazardous contaminants in the water are usually regulated and have limits, so it is important to receive a permit and understand what local and state regulations you must meet.
After transferring treated water from the precipitation tank to the clear-well, the water then needs to be checked to ensure the contents meet your permit limits. If the contents do not meet your limits, the water can be sent to the ion exchange tank so it can be treated with an ion exchange column. Once the limits have been met, after precipitating or ionizing, the treated water can be sent to the final tank.
Approximate Cost = $350,000
Inspect (Chemcut product)
Once your panels are completed, it is good practice to frequently check the quality. Some of the tools commonly used for quality evaluation are microscopes, calipers, pin gauges, and micrometers. These tools are all used to manually check the qualities of the final product, but there are also automated inspection tools that can be implemented into the process. The automated options can become expensive, but they offer the benefit of high production rates and consistent production quality if they are integrated with process controls.
Approximate Cost = $75,000
What is the next step?
Once you have planned out your equipment and determined your chemistry, photoresist, and materials, the next step is to reach out to the suppliers. Any additional questions you have, they should be able to clear up because there are plenty of people who enter this industry with little experience. Any supplier who is familiar with the industry should be able to guide you through every step of the way. The resources are available out there for you to learn, so why not use them to your advantage?
The total cost to become a fully equipped and functional chemical milling shop is approximately $1,700,000. Undoubtedly, going into the chemical milling industry is a big commitment, but all the upfront investment, planning, and research pays off. There are plenty of resources on the topic of chemical milling and photochemical machining so please do not feel discouraged. We are here to help. If you have any questions, feel free to contact us. If any of those questions pertain to the wet processes such as cleaning, developing, etching, and stripping, our whitepaper, “Guide to Photo Chemical Wet Processing Equipment”, goes further in depth with the equipment capabilities.
Thank you for reading! We hope you found this article useful for your journey into the industry.


